Sugar Dot Cookies . . . Offering the best cookie decorating and baking supplies. Here to help you start or grow your cookie business!
  • Home
  • Contact Me
  • About Me
    • Compliments
  • shop
  • Newsletter
  • Collabs
  • Blog
  • Get Featured!
  • Stitches

How to Make Royal Icing Transfers - Tutorial

4/9/2019

5 Comments

 
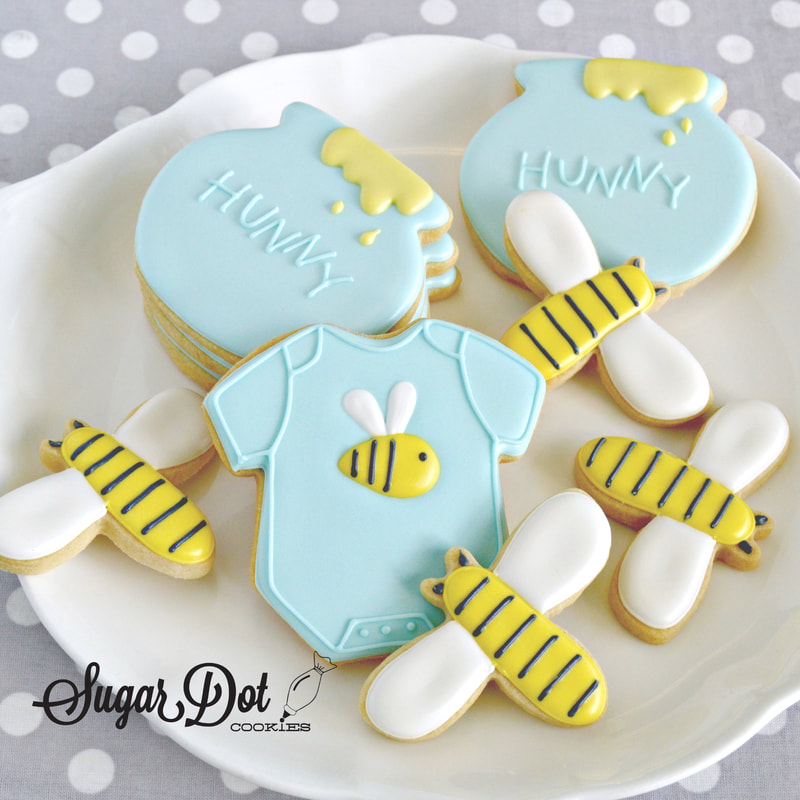
Sugar Dot Royal Icing Transfer Sheets - click here to purchase.

Royal icing transfers are little candies used as decorative elements on cookies, cakes, and cupcakes.

Royal icing is piped onto a design transfer sheet that acts as a template.  The shapes or "transfers" are allowed to dry overnight before being peeled off the backing.  They can then be dropped onto a freshly flooded cookie or "glued" onto a dry base with more icing. 

Royal icing transfers can be stored indefinitely so you can make them ahead of time for a specific project or keep some on hand to grab any time.

Royal icing transfers fit perfectly with my design style of "keep it simple".
Picture
Bee on the onesie is a transfer.
Picture
Chicken wings are transfers.
Picture
BABY letters are transfers.
Picture
Eyes are transfers.
 Why should you make royal icing transfers instead of just piping the design onto the cookie?  So many reasons!
1.  To get consistent results.  When using a Sugar Dot Transfer sheet, every single transfer will be identical.  No need to eyeball it or use a projector.
2.  Save time on decorating day.  Make the transfers ahead, when you have time.  On decorating day, just drop or glue them on.  If you have a huge order, transfers can be a life-saver.
3.  Prevent cratering.  Do you have an issue with small areas sinking, or "cratering" after they dry?  For some reason, that doesn't seem to happen when making royal icing transfers!
4.  Great way to use up leftover icing.  Make transfers with extra icing so you'll always have some on hand.  Eyeballs and flowers never go to waste!

Why should you purchase Sugar Dot Transfer Sheets? 
1.  Sure you could make them yourself, but that takes time.  Time is money.  Purchasing these sheets takes seconds.  You could be ready to pipe immediately.
2.  You are going to love how these sheets are set up!  The designs are grouped and numbered - no more counting over and over again to see how many transfers you've made.  There's also a "notes" area for you to jot down what designs you use each design sheet for.

So how DO you make Royal Icing Transfers?  It couldn't be easier.  Purchase the Sugar Dot Transfer Sheets that will work with your project.  Then it's simply a matter of:
1.  Print
2.  Pipe
3.  Peel
4.  Adhere
5.  Store

Supplies Needed:
* Sugar Dot Transfer Sheets
* Bagged Royal Icing - One consistency or two.  It's up to you and may depend on design.
* Cookie pans - I love these from DollarTree.  Love the size because you don't have to reach far.  Love the price.  Love that they fit in the dehydrator.
* Sheet Protectors -(affiliate link) Cut a strip off near the holes so that they fit flat onto the cookie sheets.  (If you don't have sheet protectors, you can use waxed or parchment paper.)
* Mini Storage Containers - I love these from Dollar Tree.  The rectangular ones store together nicely without wasting room.

Let's look at each step......
1.  Print:  Sugar Dot Transfer Sheets are digital products.  Once purchased they are available to download immediately.  Print them out.  Insert a sheet into a page protector.
2.  Pipe the designs directly onto the page protector.  Need to pipe more than that one sheet?  You could print out a second one or just pull the sheet out and into another page protector. You could put your transfers in front of a fan or into a dehydrator to dry.  Allow the transfers to dry overnight - at least.  Transfers must be thoroughly dry before removing and storing.
3.  Peel: Ever so gently, peel the sheet protectors from the transfers.  Notice that I didn't say "Peel the transfers from the sheet protectors."?  If you bend back the sheet protectors from the transfers, you'll have less breakage.  Just wipe the page protectors off to be used again.
4.  Adhere:  You can either drop the dried transfers onto a freshly flooded cookie or you can "glue" the transfers to a dried base with a dab of royal icing.  I like to use tweezers to drop on the transfers.  It makes grasping and placing much easier. When dropping onto a wet cookie - be sure to "under-flood" to reduce the risk of your icing running off your cookie once the transfer is in place.
5.  Store:  Be sure that your transfers are completely dry.  You can save transfers indefinitely.  Place them in air-tight containers, out of sunlight, at room temperature.
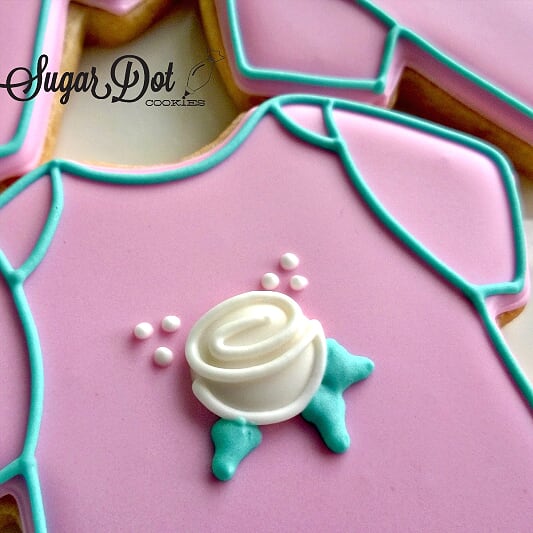
NOTE:
*  Always make extra transfers!  They are fragile so can easily break.  The more narrow the transfer, the more fragile.  They can break while removing from the sheet protectors.  They can break while handling during decorating.  Oh, and sometimes you might drop one onto a flooded cookie and it lands upside down so you need to fish it out and drop on a new one!  Watch and plan for all that!
* Be careful of color bleed.  Use care when your transfer and base are two extremes of light and dark, for ex: white transfer onto black base or black transfer onto white base.  Use as little food coloring as possible when making dark icing.  Remember that it will darken as it develops and dries.  You might want to use the "glue" method when bleeding is a concern.  Bleeding is more likely to happen when dropping the transfers onto a wet base.
*  Make sure the transfers are 100% dry before storing.  Overnight is usually fine. If you live in a humid climate, allow more dry time.  Using too much food coloring and over-mixing your royal icing can cause drying issues.  If you've made either of those two mistakes, your transfers may never fully dry.  They'll be difficult to remove but if you can, they're still usable.  I wouldn't store transfers that haven't dried for future use though.
*  Use care when piping multi-sectional designs with small protrusions.  For example, the bee with wings.  Check out my tutorial here with my #1 most important tip to make your transfers sturdier!  Watch the video below.  Notice how I piped the wings first, bringing them down into the body area?  Had I piped the body first, then the wings above - those wings could have easily snapped off.  Same goes for the pumpkin transfers - Notice how I swiped the stems INTO the center of the pumpkins.
Picture
Rose is transfer.
Picture
Eyeballs are transfers.
Watch a few videos to see how to make the transfers and add them onto cookies.
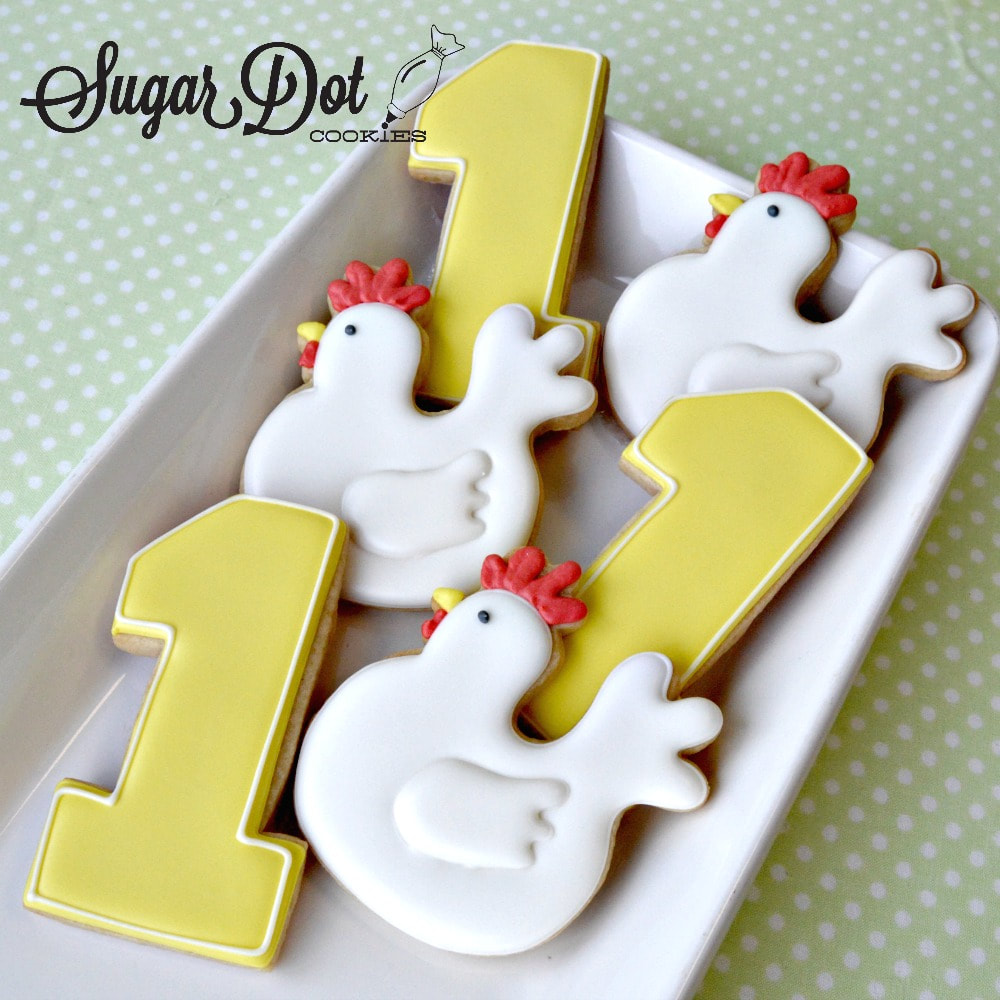
Royal Icing Transfers are not just for cookies!  They make fabulous decorations for cupcakes and cakes.  Imagine carrots for carrot cake and lemons on lemon chiffon!  Decorate birthday cakes with balloon and number transfers!  The possibilities are endless!

Let's not forget about buttercream.  You can absolutely use the transfer sheets with buttercream.  Pipe your designs.  Put them into the freezer.  Peel them off and apply to your cake or cupcake.
Check my youtube channel for more videos.
5 Comments
Barbara Setchfield
2/19/2020 10:20:22 am

Love your transfers! Would like to see more.

Reply
Cathy
9/3/2020 12:37:46 pm

Help I purchased the transfer sheet circles
I’m wanting to make the small flowers #1 itty bitty I watched your video but I don’t see the tip number for this. I’m sure I’m looking in the wrong spot and missing it. Can you tell me what to use and or where this might be noted.
Don’t know if it’s two different tips or you’re using the same one. Thanks so very much. Cathy
Love the transfer sheet idea looking forward to using it.

Reply
Dotty link
9/3/2020 12:45:02 pm

Thanks for purchasing the template Cathy! In the video on this page, I'm using a PME 1.5 tip to do the swirl on top of the dried dot of RI. I prefer PMEs but if you have a Wilton 1, that will work also. :)

Reply
Eileen Daudelin
1/22/2022 01:51:53 pm

I struggle with making dots my centers always cave in.
Am I maybe using the wrong consistency of RI or am I applying it to the paper wrong.
Please send some suggestions

Reply
Dotty link
1/22/2022 02:46:30 pm

Interesting. I've never seen cratering with transfers. Two suggestions: Use thicker icing. Use a fan or dehydrator to speed up the drying. I hope that will help!

Reply


Leave a Reply.

    Posts:
    Instagram Collabs
    SugarDot Update
    Business FB Group
    How To - Water Brush
    RI Transfer Tips
    How to - RI Transfers

    RSS Feed

Home
About

Shop
Contact Me
Newsletter
Blog
Get Featured


Cookies as Business Ebooks
Cookie Supplies
Cookie Cutters
Royal Icing Transfer Templates
Gift Shop
On Sale


Follow me on Facebook
Follow me on Instagram
Follow me on YouTube
Follow me on Pinterest
Join my Facebook Group - Cookies as Business with Sugar Dot

Picture
  • Home
  • Contact Me
  • About Me
    • Compliments
  • shop
  • Newsletter
  • Collabs
  • Blog
  • Get Featured!
  • Stitches